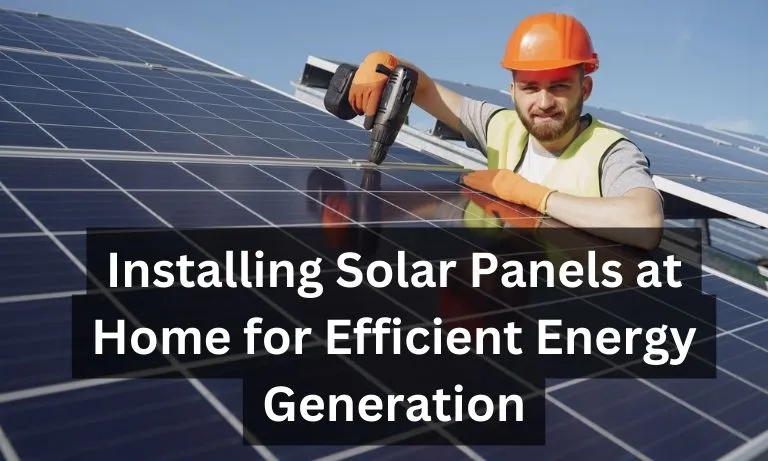
Step-by-Step Guide: Installing Solar Panels at Home for Efficient Energy Generation
Are you considering installing solar panels at home but feeling overwhelmed by the process? Don’t worry, you’re not alone. With increasing concerns about climate change and rising electricity costs, many people are turning to solar energy as a more sustainable and cost-effective option. In this step-by-step guide, we will break down the installation process and provide tips to make it easier for you.
What Are Solar Panels?
Solar panels are devices that harness sunlight to produce electricity through the use of photovoltaic cells. These cells are composed of semiconductor materials, like silicon, that absorb photons from the sun and release electrons, creating an electric current. Typically, solar panels consist of multiple interconnected photovoltaic cells that form a module or panel.
The electricity generated by solar panels can be used to power homes, businesses, and vehicles. This renewable and sustainable source of energy is readily available as sunlight is abundant. In recent years, the popularity of solar panels has grown due to their numerous benefits, including reducing electricity bills, lowering carbon emissions, and providing energy independence.
When considering solar panels for your home, it is important to evaluate factors such as the amount of sunlight your location receives, the available roof space, and the energy needs of your household. Additionally, it is crucial to consider the cost, efficiency, and durability of the solar panels to make an informed decision that best fits your needs and budget.
How Do Solar Panels Work?
Solar panels function by utilizing the energy from the sun to produce electricity. Below is a step-by-step guide on the process of how solar panels work:
- Photovoltaic Cells: Solar panels are composed of photovoltaic cells, which are constructed from layers of semiconducting materials like silicon.
- Conversion of Sunlight: When sunlight hits the solar panels, the photovoltaic cells absorb the energy from the photons in the sunlight.
- Electron Movement: The absorbed energy causes the electrons in the semiconducting material to become excited and move, generating an electric current.
- Direct Current (DC): The electric current produced by the solar panels is in the form of direct current (DC) electricity.
- Inverter: The DC electricity is then sent to an inverter, which converts it into alternating current (AC) electricity that can be utilized in homes and buildings.
- Electrical Usage: The AC electricity produced by the inverter is then used to power electrical devices and appliances in your home.
- Excess Electricity: If your solar panels generate more electricity than what is needed, the excess can be sent back to the grid for others to use or stored in batteries for future use.
To ensure optimal efficiency and effectiveness of your solar panels, it is recommended to consult with a professional installer for proper installation and maintenance. Additionally, regularly monitoring the performance of your solar panels and keeping them clean can help enhance their functionality. With a thorough understanding of how solar panels work, you can make informed decisions when considering installing them in your home.

What Are the Benefits of Installing Solar Panels at Home?
The decision to install solar panels at home has become increasingly popular in recent years, and for good reason. Not only do solar panels offer a sustainable and eco-friendly energy source, but they also come with a variety of benefits for homeowners. In this section, we will discuss the numerous advantages of installing solar panels, including saving money on electricity bills, reducing your carbon footprint, and increasing the value of your property. Let’s take a closer look at each of these benefits and how they can positively impact your life.

1. Save Money on Electricity Bills
Installing solar panels at home can significantly save you money on electricity bills. Here is a step-by-step guide to help you get started:
- Determine your energy needs: Assess your current electricity consumption to determine the size and type of solar panel system required.
- Choose the right solar panel system: Consider factors such as efficiency, cost, and warranty when selecting the solar panels and other necessary equipment.
- Find a qualified installer: Research and hire a reputable solar panel installer who is experienced and certified.
- Obtain necessary permits and approvals: Contact your local authorities to obtain the required permits and approvals for installing solar panels.
- Prepare your roof for installation: Ensure that your roof is structurally sound and can support the weight of the solar panels. Make any necessary repairs or reinforcements.
- Install the solar panels: The installer will mount the solar panels on your roof, positioning them for optimal sunlight exposure.
- Connect the solar panels to your home’s electrical system: The installer will connect the solar panels to your home’s electrical system, allowing you to use the solar-generated electricity.
- Test and monitor your solar panel system: After installation, the system will be tested to ensure it is functioning properly. Regularly monitor its performance for any issues.
By following these steps, you can effectively save money on electricity bills while enjoying the benefits of solar power.
2. Reduce Carbon Footprint
Reducing your carbon footprint is one of the main benefits of installing solar panels at home. By utilizing the power of the sun, you can greatly decrease your dependence on non-renewable energy sources and minimize the emissions associated with fossil fuel-based electricity production. Here are the steps to take in order to reduce your carbon footprint through solar panel installation:
- Assess your energy needs: Determine your electricity consumption to determine the size and capacity of the solar panel system required.
- Select the right solar panel system: Choose high-efficiency solar panels and consider factors such as installation location, available sunlight, and budget.
- Engage a qualified installer: Find a reputable and experienced solar panel installer to ensure proper installation and system performance.
- Obtain necessary permits and approvals: Check local regulations and obtain the necessary permits to comply with legal requirements.
- Prepare your roof for installation: Ensure that your roof is structurally sound and has adequate space and orientation for optimal placement of the solar panels.
- Install the solar panels: The installer will securely mount the panels on your roof or other suitable support structures.
- Connect to your home’s electrical system: Integrate the solar panel system with your home’s electrical wiring to begin generating clean energy.
- Test and monitor the system: Ensure that the system is functioning properly and use monitoring tools to track energy production and performance.
By following these steps, you can effectively reduce your carbon footprint and contribute to a more sustainable future.
3. Increase Property Value
Installing solar panels at home can have a significant impact on your property value. To help you navigate the process, here is a step-by-step guide:
- Determine Your Energy Needs: Start by assessing your current energy consumption to determine the appropriate size and capacity of the solar panel system.
- Choose the Right Solar Panel System: Do your research and select a solar panel system that meets your energy needs and fits your budget.
- Find a Qualified Installer: It is important to find a reputable and experienced solar panel installer who can ensure proper installation.
- Obtain Necessary Permits and Approvals: Before installing the solar panels, make sure to check and obtain any required permits or approvals from local regulations.
- Prepare Your Roof for Installation: Ensure that your roof is in good condition and can support the weight of the solar panels.
- Install the Solar Panels: The installer will securely place the solar panels on your roof, following industry best practices.
- Connect the Solar Panels to Your Home’s Electrical System: The installer will then connect the solar panels to your home’s electrical system, allowing you to use the generated solar energy.
- Test and Monitor Your Solar Panel System: After installation, the system will be thoroughly tested to ensure proper functioning. Regular monitoring will also help you track its performance.
Investing in solar panel installation is a smart decision that can increase your property value while also providing financial and environmental benefits. Solar panels have been used for electricity generation since the 1950s, primarily for space exploration. However, their use in residential and commercial settings has become more popular in recent decades due to technological advancements and a growing awareness of the advantages of renewable energy sources. The solar industry has seen significant growth, with improved efficiency and affordability, making it a viable option for homeowners looking to reduce their carbon footprint and boost their property value.
What Are the Steps to Install Solar Panels at Home?
Are you considering installing solar panels at home to reduce your carbon footprint and save money on electricity? The process may seem daunting, but by breaking it down into clear steps, it can be easily manageable. In this section, we will guide you through each step of installing solar panels at home, from determining your energy needs to connecting the panels to your electrical system. By following these steps, you can confidently embark on your journey towards a more sustainable and cost-effective energy source for your home.
1. Determine Your Energy Needs
Determining your energy needs is the first crucial step when installing solar panels at home. Follow this step-by-step guide to help you through the process:
- Evaluate your current energy consumption: Review past electricity bills to determine your average monthly and annual energy usage.
- Consider future energy needs: Take into account any anticipated changes in your household, such as the addition of new appliances or an electric vehicle.
- Assess available roof space: Determine the amount of space available on your roof for solar panel installation. Consider factors such as shading and the orientation of your roof.
- Calculate the required system size: Based on your energy needs and available roof space, work with a solar professional to determine the appropriate system size in kilowatts (kW) or kilowatt-hours (kWh).
- Consider financial goals: Determine your financial objectives, such as reducing your electricity bill or maximizing your return on investment.
- Explore financing options: Research financing options like solar loans, leases, or power purchase agreements to determine the best fit for your financial situation.
By following these steps, you can accurately determine your energy needs and make informed decisions when installing solar panels at home.
2. Choose the Right Solar Panel System
Choosing the right solar panel system is essential for maximizing the benefits of installing solar panels at home. To help you make the right choice, here are the steps to follow:
- Assess your energy needs: Start by determining your average monthly electricity consumption and considering any potential changes in energy usage.
- Research solar panel options: Familiarize yourself with the different types of solar panels available, including monocrystalline, polycrystalline, and thin-film. Consider factors such as efficiency, durability, and aesthetic appeal.
- Consider the system size: Calculate the required system size based on your energy needs and the available roof space.
- Evaluate warranties and certifications: Opt for solar panels that come with long-term warranties and are certified by reputable organizations.
- Check for local incentives: Research any government incentives or rebates that may help offset the cost of installing solar panels.
- Get multiple quotes: Obtain quotes from various solar panel installers to compare prices, system designs, and installation quality.
- Review customer reviews and testimonials: Take the time to read reviews from past customers to gain insights into the installer’s reputation and customer satisfaction.
- Seek professional advice: Consult with a solar energy expert or installer to receive personalized recommendations based on your specific requirements.
Choosing the right solar panel system is crucial for a successful solar installation that meets your energy needs and provides long-term benefits. In today’s market, consumers have a wide range of options to choose from, with improved efficiency, durability, and sleek designs. By selecting the right system, homeowners can contribute to a more sustainable future while enjoying the financial benefits of reduced electricity bills.
3. Find a Qualified Installer
Finding a qualified installer is crucial when considering installing solar panels at home. Follow these steps to ensure you choose the right professional for the job:
- Research local installers: Look for solar installation companies in your area that have experience and a good reputation.
- Check certifications and licenses: Verify that the installers have the necessary certifications and licenses required to perform the installation.
- Read customer reviews: Look for feedback from previous customers to get an idea of the installer’s quality of work.
- Get multiple quotes: Contact different installers and request quotes for the installation. Compare prices and services offered.
- Ask for references: Request references from the installers to speak with previous customers and get their feedback on the installation process.
- Consider warranties and guarantees: Inquire about warranties on the installation and the solar panels themselves.
- Ask about maintenance and support: Find out if the installer offers maintenance services and ongoing support for the solar panel system.
By following these steps, you can find a qualified installer who will ensure a smooth and successful solar panel installation at your home.
4. Obtain Necessary Permits and Approvals
Obtaining necessary permits and approvals is a crucial step in the process of installing solar panels at home. It guarantees compliance with local regulations and safety standards. Here is a step-by-step guide:
- Research local regulations: Familiarize yourself with the specific permits and approvals required in your area.
- Prepare documentation: Gather all required documents, such as proof of property ownership, architectural drawings, and electrical plans.
- Submit applications: Complete and submit the necessary permit and approval applications to the relevant local authorities, such as the building department or utility company.
- Pay fees: Pay any necessary fees associated with the permit and approval process.
- Review process: Allow time for the authorities to review your application and plans. They may request additional information or modifications.
- Inspections: Schedule and pass any required inspections to ensure the installation meets safety and quality standards.
- Final approval: Once all inspections are passed, you will receive final approval from the authorities.
By following these steps and obtaining the necessary permits and approvals, you can ensure a smooth and compliant installation of solar panels at home.
5. Prepare Your Roof for Installation
Before installing solar panels on your roof, it’s important to properly prepare the area to ensure a smooth and efficient installation. Here are the steps to prepare your roof for solar panel installation:
- Clean the roof: Remove any debris, leaves, or branches from the roof to create a clean surface for installation.
- Inspect the roof: Check for any existing damage or leaks on your roof. It’s crucial to address these issues before installing the solar panels.
- Reinforce the roof structure: Depending on the weight and size of the solar panels, you may need to reinforce the roof structure to ensure it can support the extra weight.
- Trim trees and foliage: Trim any overhanging tree branches or nearby foliage that may shade the solar panels and reduce their efficiency.
- Mark placement and orientation: Work with your installer to mark the exact placement and orientation of the solar panels on your roof. This will ensure optimal sunlight exposure.
By following these steps and properly preparing your roof, you can ensure a successful solar panel installation and make the most of solar energy for your home.
6. Install the Solar Panels
When it comes to installing solar panels at home, it is important to follow a step-by-step process to ensure a successful installation. Here is a list of steps to guide you through the installation process:
- Determine the optimal location for the solar panels based on sunlight exposure and available roof space.
- Ensure that the roof is structurally sound and capable of supporting the weight of the solar panels.
- Hire a qualified and experienced installer to handle the installation process.
- Obtain the necessary permits and approvals from relevant authorities before proceeding with the installation.
- Prepare the roof by cleaning and inspecting it to ensure it is free from any debris or damage.
- Follow the manufacturer’s instructions and guidelines to properly install the solar panels on the roof.
- Connect the solar panels to your home’s electrical system, ensuring proper wiring and connections.
- Test and monitor the solar panel system to ensure it is functioning correctly and producing the expected energy output.
Pro-tip: Consider installing a monitoring system that allows you to track the performance of your solar panel system and identify any issues early on. This will help you maximize the benefits of your solar panels and ensure long-term efficiency.
7. Connect the Solar Panels to Your Home’s Electrical System
To successfully connect your solar panels to your home’s electrical system, follow these steps:
- First, turn off the main electrical disconnect switch to ensure safety during the installation process.
- Next, locate the junction box on the back of the solar panels and remove the cover.
- Then, connect the positive and negative wires from the solar panels to the corresponding terminals in the junction box.
- Secure the connections using waterproof connectors or wire nuts, making sure to cover any exposed wiring.
- Run conduit or conduit-free wiring from the junction box to the inverter.
- Connect the wiring from the junction box to the input terminals of the inverter.
- Next, connect the output terminals of the inverter to the main electrical panel of your home.
- Turn on the main electrical disconnect switch and the inverter to start generating electricity from the solar panels.
- Remember to regularly monitor the system for proper functioning and contact a professional if any issues arise.
By following these steps, you can successfully connect your solar panels to your home’s electrical system and begin reaping the benefits of renewable energy.
8. Test and Monitor Your Solar Panel System
After the installation of your solar panel system, it is essential to regularly test and monitor its performance to ensure it is functioning at its best and identify any potential issues. Here are some crucial steps to follow in order to test and monitor your solar panel system:
- Monitor the energy production: Keep track of the energy generated by your solar panels using a monitoring system or inverter. This will allow you to assess if the system is performing as expected.
- Check for any abnormalities: Regularly inspect the system for any signs of physical damage, loose connections, or unusual behavior. This can help detect any issues that may affect the performance of the system.
- Monitor energy consumption: Compare your energy consumption before and after installing the solar panels. This will help you determine the effectiveness of the system in reducing your electricity usage.
- Test backup systems: If you have a backup battery or a grid-tied system with net metering, it is important to periodically test these systems to ensure they are functioning properly.
- Review monitoring data: Analyze the data collected from the monitoring system to identify any patterns or trends. This can help you optimize the usage of your solar panel system.
One true story that highlights the importance of testing and monitoring a solar panel system involves a homeowner who noticed a decrease in energy production during a hot summer. Through monitoring, they discovered that one of the panels had a malfunctioning connection. By promptly addressing the issue, they were able to restore the system’s performance and avoid potential long-term damage.
What Maintenance is Required for Solar Panels?
Installing solar panels at home is a great way to reduce your carbon footprint and save on energy costs. However, like any other technology, solar panels require some maintenance to ensure optimal performance. In this section, we will discuss the key maintenance tasks that are necessary for keeping your solar panels in top condition. From regular cleaning and inspection to identifying and addressing any damage or malfunction, we’ll cover all the important steps for maintaining your solar panels.
1. Regular Cleaning and Inspection
Regular maintenance and inspection are essential for preserving the efficiency and lifespan of solar panels. Here is a step-by-step guide to follow:
- Inspect for debris: Regularly check the panels for any accumulated dirt, leaves, or other debris.
- Clean the panels: Use a soft brush or sponge and a gentle, non-abrasive cleaning solution to remove dirt and grime. Rinse thoroughly with water.
- Check for damage: Inspect the panels for any cracks, loose connections, or other signs of damage. If any issues are found, contact a professional for repairs.
- Monitor performance: Keep track of the energy output of your solar panels to ensure optimal functioning. Utilize monitoring software or consult with your installer for guidance.
- Perform regular maintenance: Schedule routine maintenance visits from a qualified technician to conduct more thorough inspections and address any potential issues.
By following these steps and conducting regular cleaning and inspections, you can ensure that your solar panels continue to produce clean and sustainable energy for your home.
2. Checking for Damage or Malfunction
When it comes to maintaining solar panels, it is crucial to regularly check for any damage or malfunction to ensure optimal performance and longevity. Here are the steps to follow for checking for damage or malfunction:
- Inspect the physical condition: Examine the solar panels for any visible signs of damage, such as cracks, scratches, or discoloration.
- Check for loose connections: Ensure that all electrical connections, including cables and wiring, are securely and tightly connected.
- Monitor energy output: Keep track of your solar panel system’s energy production to identify any significant drops or fluctuations that could indicate a malfunction.
- Look for shading issues: Make sure that there are no obstructions, such as tree branches or debris, casting shadows on the solar panels, as this can reduce their efficiency.
- Review monitoring data: Utilize any monitoring devices or software provided with your solar panel system to analyze performance data and identify any anomalies or deviations from the expected output.
- Consult a professional: If you suspect any damage or malfunction that you are unable to address, it is advisable to contact a qualified solar panel technician for assistance and further evaluation.
Regularly checking for damage or malfunction and promptly addressing any issues will help ensure that your solar panel system continues to operate efficiently and effectively.
Frequently Asked Questions
How many solar panels are needed to power a house?
The number of solar panels required depends on your household’s energy consumption, sunlight hours in your location, and the desired level of electricity generation. The article mentions an average of 17-21 panels can cover a home’s needs, but it’s best to consult a professional for a specific assessment.
Can I install solar panels myself?
We recommends consulting a professional installer for proper installation and maintenance. While DIY installations might be possible, it’s safer and ensures optimal performance to hire a qualified professional.
Can solar power run an air conditioner?
Yes, solar panels can generate enough electricity to power an air conditioner, but the system size needs to be adequate to meet your cooling needs.
How long do solar panels last?
The article states that solar panels typically last 25 years or more with proper maintenance.
How long will solar energy last?
Solar energy is a renewable resource derived from the sun, and it will essentially last as long as the sun exists, which is billions of years.
Are solar panels easy to maintain?
Yes, solar panels require minimal maintenance. Regular cleaning and occasional inspections are recommended, and the article suggests consulting a professional for periodic checkups.
Do solar panels work at night?
No, solar panels cannot generate electricity at night because they rely on sunlight. However, some systems incorporate battery storage to use solar energy during nighttime.
How long does it take for solar panels to start generating electricity?
Solar panels start generating electricity as soon as sunlight hits them. There’s no lag time in power generation.
Should I leave my solar panels on all the time?
There’s no need to manually turn solar panels on or off. They automatically generate electricity when sunlight is available.
Do solar panels work in the rain?
Yes, solar panels can work in the rain. Rain can actually help clean dust or debris off the panels, improving efficiency.
Can a solar panel work without sun?
No, solar panels cannot generate electricity without sunlight.
Can solar panels work without a battery?
Solar panels can function without a battery, but the generated electricity needs to be used during daylight hours. Batteries allow you to store excess solar energy for nighttime use.
Do solar panels work with moonlight?
Solar panels require sunlight, not moonlight, to generate electricity. Moonlight is significantly less powerful than sunlight.
What are the disadvantages of solar energy?
The upfront installation cost of solar panels can be high. Solar energy production also depends on sunlight availability, and efficiency can be reduced by factors like shade or extreme weather.
Do solar panels need direct sunlight or just light?
Solar panels require direct sunlight for optimal electricity generation. Indirect sunlight can still produce some power, but the efficiency will be lower.